Hello fellow crafters, welcome to my blog. I had so much fun making this card! And I am still not over it how impactful, yet simple this technique is. To be honest, when I saw you could use bleach on a card, I could not wait to try it. And I will most definitely do this again in the future. I would love to try on different colors and more complicated stamps. But ok, that’s the future. Let’s look at how I made this card.
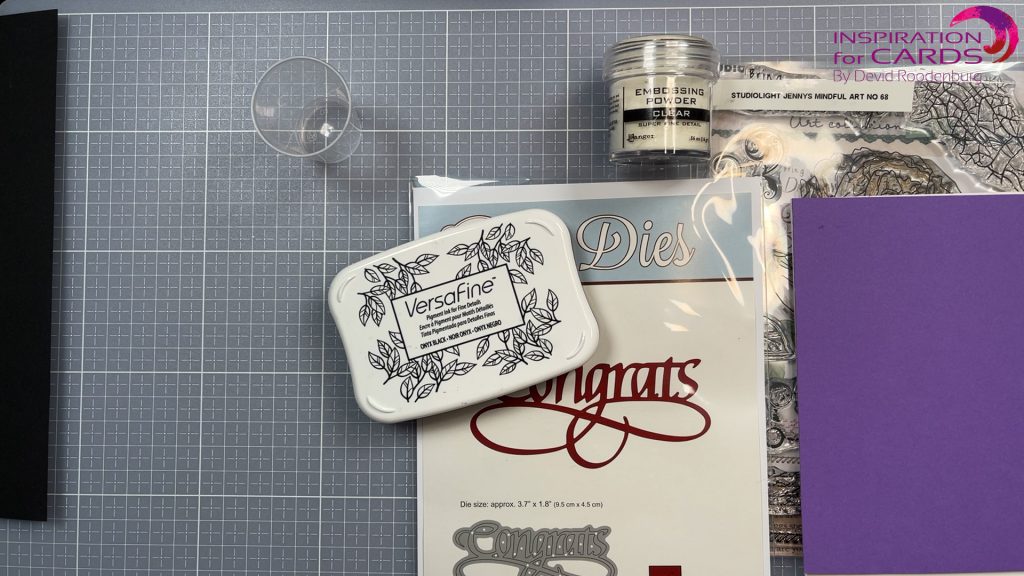
At the end of this blog, you will find a full list of supplies that I used to make this simple card. And it’s not a long list, I promise 😉
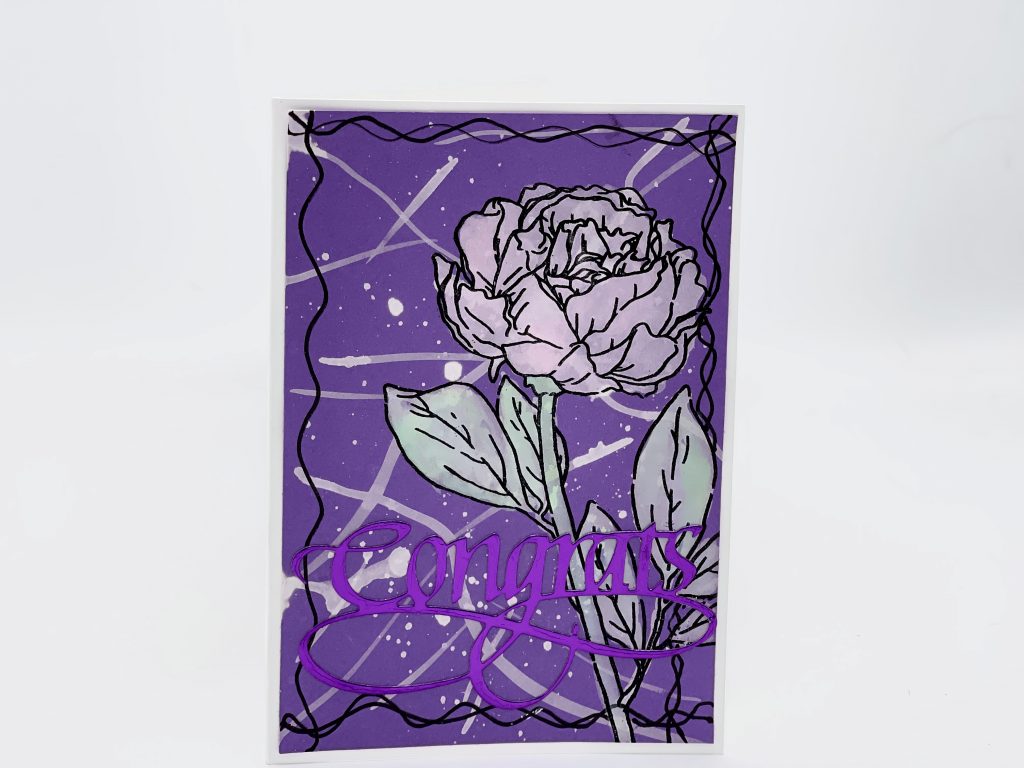
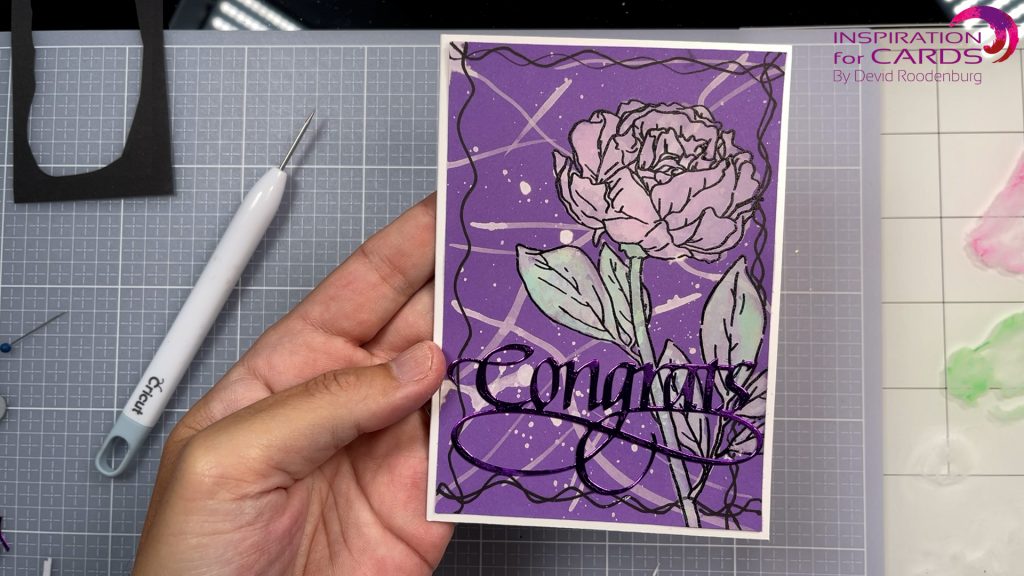
I started with a piece of purple cardstock at A6 size (comparable with US A2).
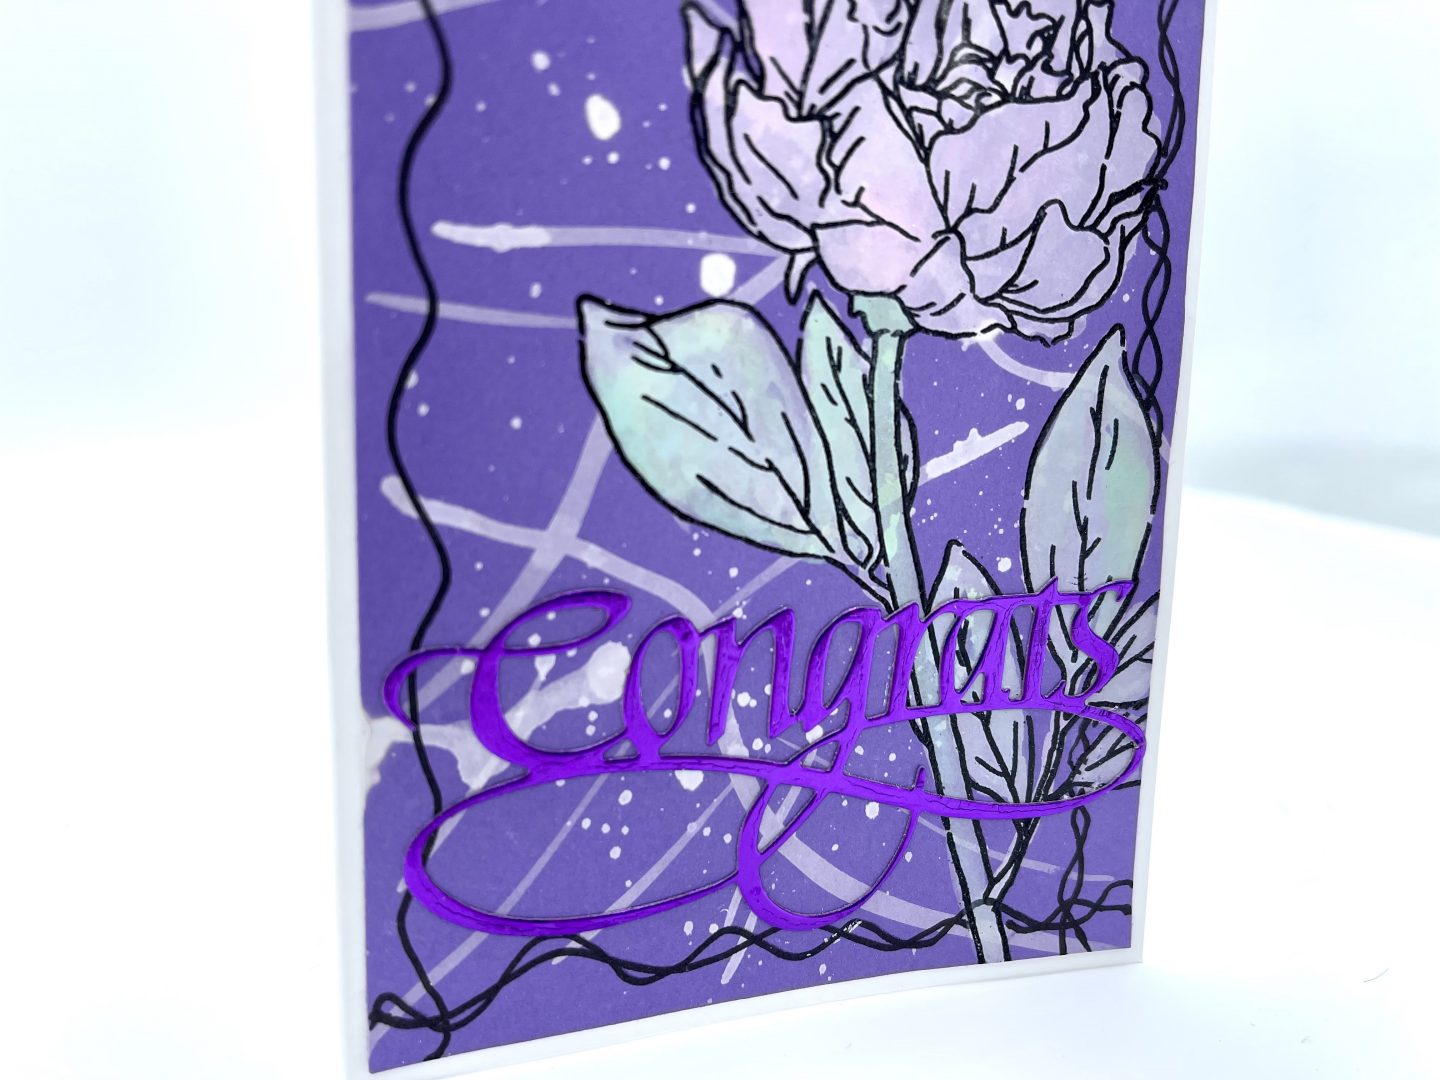
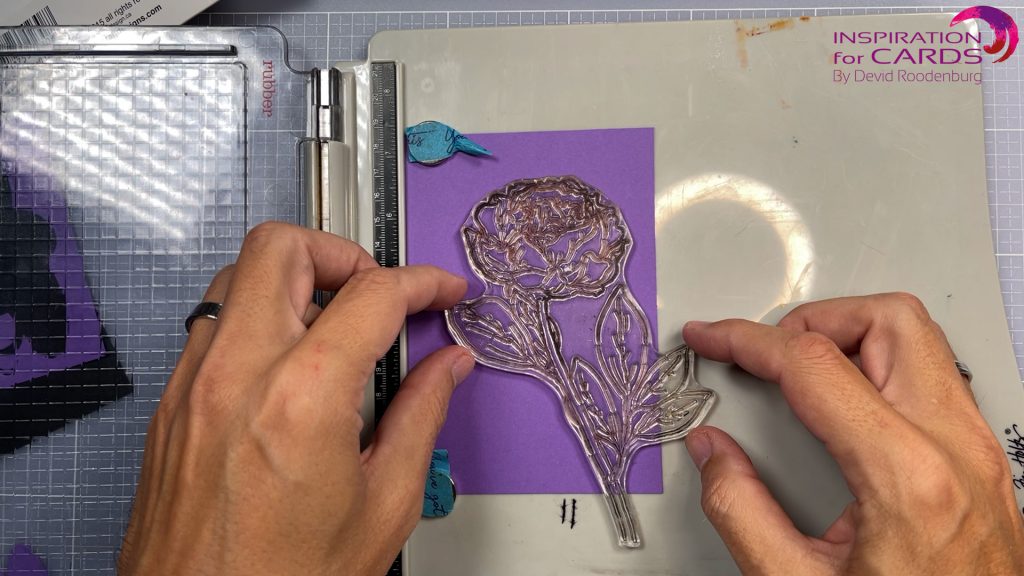
For this card I am using a big bold stamp that is outlined. This way it is easy to fill in with the bleach.

I used a pigment ink to stamp the image. Pigment ink stays wet a bit longer and makes it easier to let the embossing powder stick. When the whole image is covered, and any loose particles are removed it is time to melt the powder. I ended up with a nice, embossed flower with a raised edge to “color” in between.
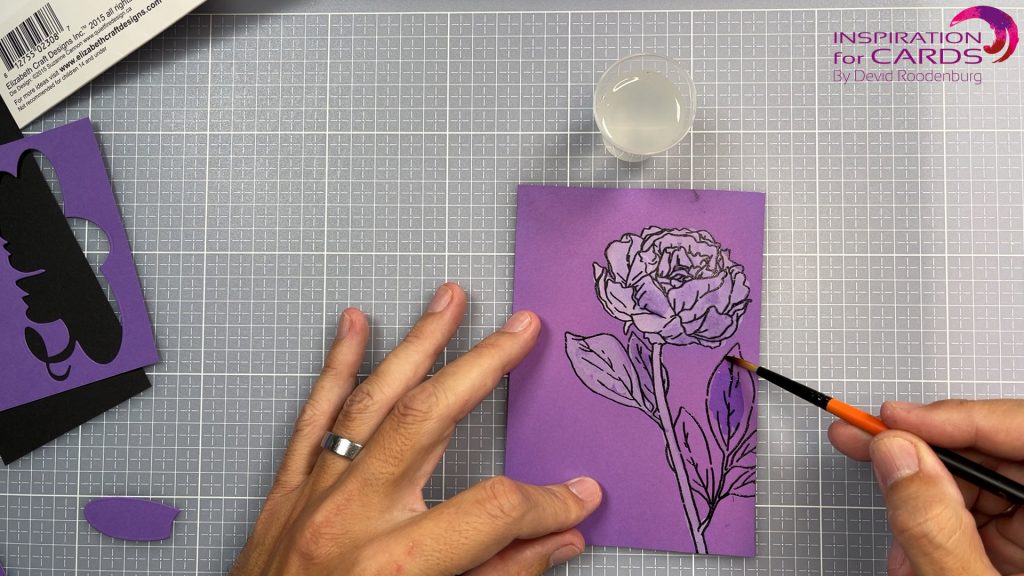
And now the real fun begins. With the use of the cheapest bleach there was, I started coloring (or should I say discoloring ;)). The magic happens right under your eyes! I also added some splashes and criss-cross lines over the card to bring the whole panel together.
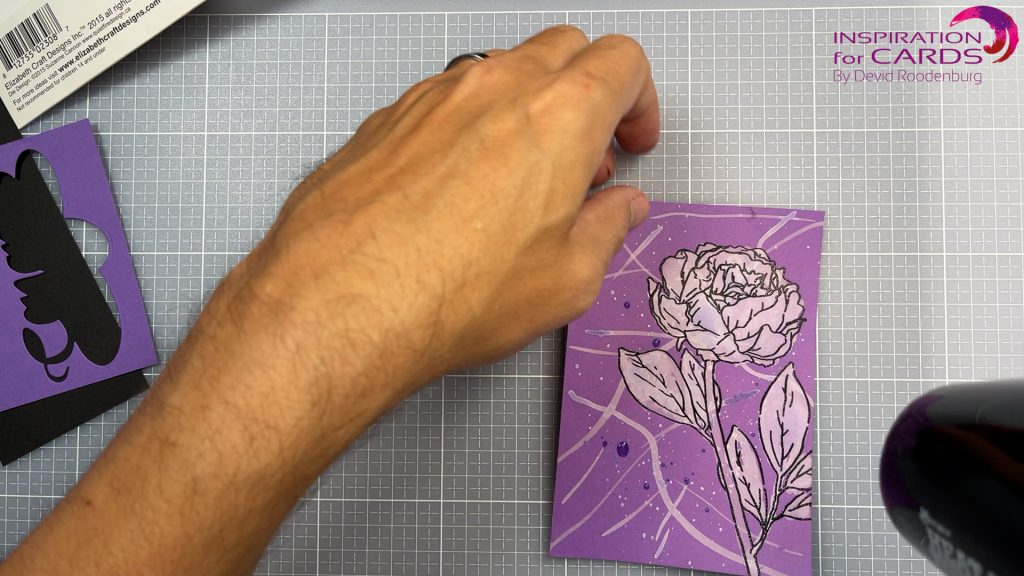
When everything is covered in bleach, I used my heat tool to make sure the whole card was dry. This will also increase the bleach effect on the card.
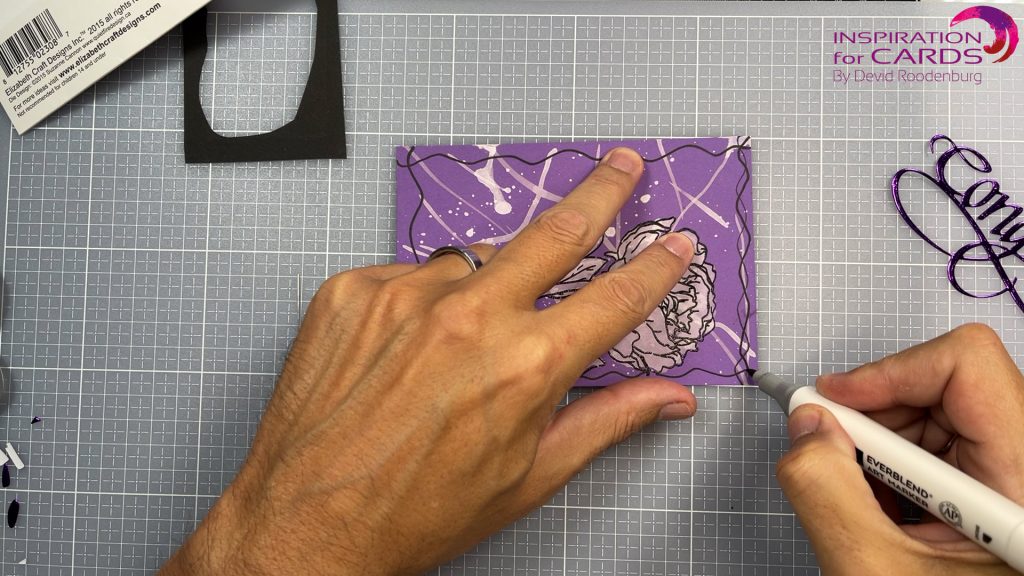
With a black marker I made some scribbly lines around the card to finish it off. This is a fun way to give the card dimension without having to put it on a mat layer.
Now you could absolutely leave it as it is now. However, I wanted to bring in a little color by using some Distress Oxides with water.
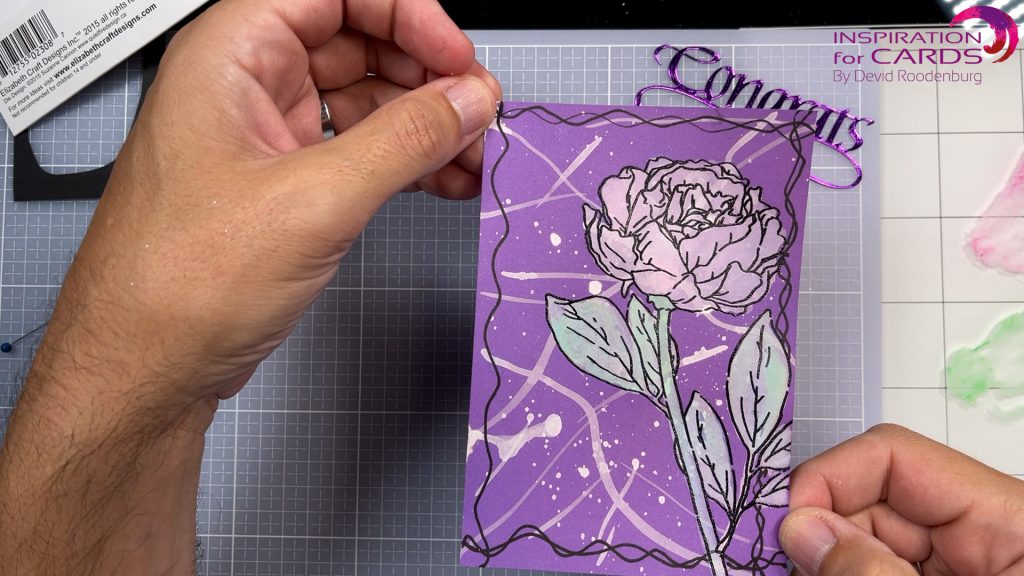
Because of the way these inks oxidize with water it gave it the same soft, velvety look that the bleach did.
Now it’s time to put the card together. With the use of my ATG gun I glued the panel to the background. With my favorite Art Glitter glue I attached the sentiment that I cut out of foiled purple cardstock and the card was already done!
As I mentioned, this technique was a lot of fun and so easy to do. If you haven’t tried it yet, give it a go. I am sure you will like it as much as I have.
Please head over to my YouTube channel for a full explanation of how I made this card.
Thank you for visiting my blog. I will be back with another one soon!
Devid
Products used:
- Studiolight Jenny’s mindful art #68 https://www.craftemotions.nl/nl/studio-light-clear-stamp-jenine-s-essentials-peony-nr-68-jma-es-stamp68-a5-05-21/a58882?search=68
- Elizabeth Craft Design congrats https://www.elizabethcraftdesigns.com/products/a-way-with-words-congrats-1156?_pos=1&_sid=84f7e1a81&_ss=r
- Ranger Distress ink worn Lipstick https://rangerink.com/products/tim-holtz-distress-oxide-ink-pad-worn-lipstickRanger
- Ranger Distress ink Cracked Pistachio https://rangerink.com/products/tim-holtz-distress-oxide-ink-pad-cracked-pistachio
- https://rangerink.com/products/tim-holtz-distress-ink-pad-vintage-photo
- Versafine black onyx http://www.tsukineko.co.jp/english/detail/versafine/index.html
- Ranger Clear embossing powder super fine https://rangerink.com/products/embossing-powder-super-fine-clear
- Lawn Fawn – Stamp Shammy https://www.lawnfawn.com/products/stamp-shammy
- Tonic Studio’s stamp platform https://www.tonic-studios.co.uk/pages/timholtzstampplatform
- Scotch ATG https://www.amazon.com/Scotch-Advanced-Glider-4-Inch-36-Yard/dp/B00409NNYM
- Art Glitter glue https://www.artglitter.com/collections/designerdriesclearadhesive
- Sizzix big shot fold away https://www.sizzix.com/662500/sizzix-big-shot-foldaway-machine-only-white-gray
- Sizzix dual speed heat tool https://www.sizzix.com/663706/sizzix-tool-heat-tool-dual-speed
- Arteza markers https://arteza.com/dp/everblend-ultra-art-markers-alcohol-based-set-of-72
- 216grms / 80lb purple cardstock
- Dollar store plain bleach